Multistreaming using AWS MediaLive to Youtube, Twitch, and more
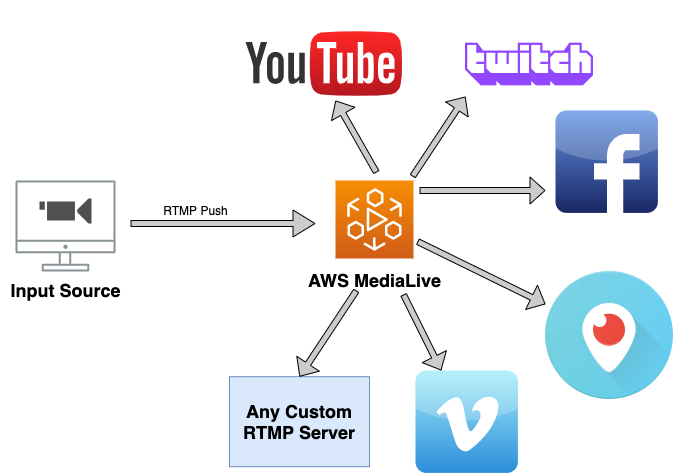
Multistreaming using AWS MediaLive makes it easy to go live on multiple social media platforms like Youtube, Twitch, Facebook, etc.
Multistreaming using AWS MediaLive is just one of many ways of doing it, and there are other solutions like setting up your own Nginx server with an RTMP module or using services like Restream.io, evaluate and choose what best suits your requirements.
To get started, log in to your AWS Console and navigate to the MediaLive Service.
Create a MediaLive Input
Step 1: From the sidebar, navigate to “Inputs” and then click “Create Input”.
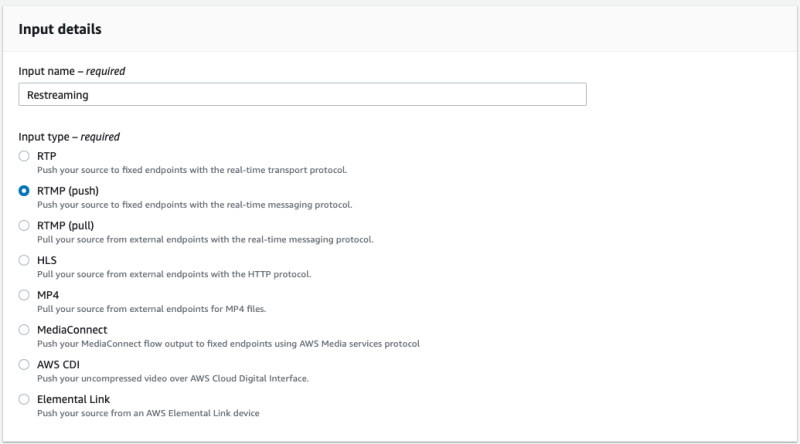
Step 2: Under “Input details” tab, enter a “Input name” and select “RTMP (push)” as “Input Type”.
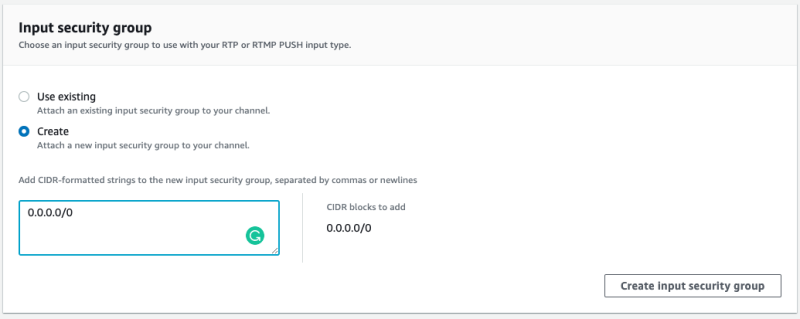
Step 3: Under the “Input security group” tab, select “create” and enter the CIDR formatted string and click create “Create input security group”.
Only the IP address falling in the CIDR range can push the RTMP stream to MediaLive. If you want to allow any IP address, you can use 0.0.0.0/0 as CIDR, but it is not recommended.
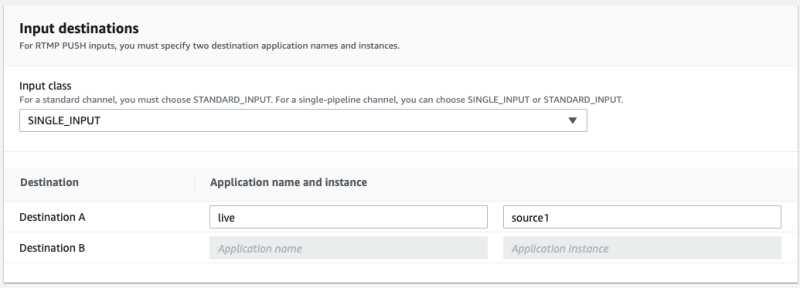
Step 4: Under the “Input destinations” tab, click SINGLE_INPUT as “Input class”. Provide an “Application name” and “Application instance”.
The application name and instance will be used to construct the input destination URL, to which you will have to push your stream.
Step 4: Finally, add tags if required, and click “Create”.
Create a MediaLive Channel
Now that we have our input source created, we can go ahead and create the MediaLive Channel. From the sidebar, navigate to “Channels”, and then click “Create Channel”.
Step 1: Enter a “Channel name”.
Step 2: For IAM Role, select “Create role from template” and click “Create IAM Role”.
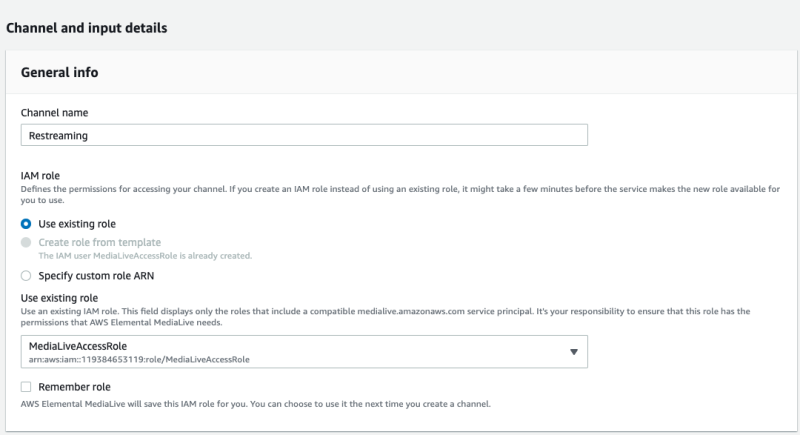
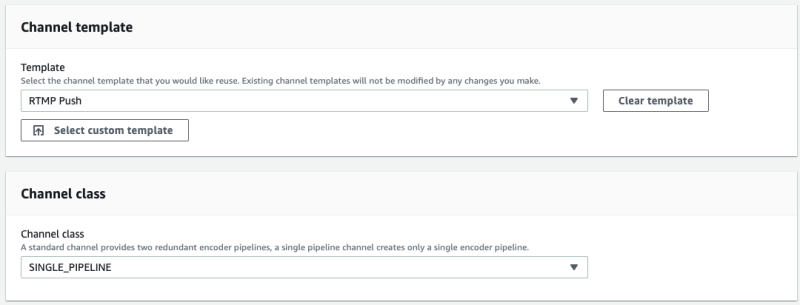
Step 3: Select “RTMP Push” for “Channel template”.
Step 4: Select “SINGLE_PIPELINE” for “Channel class”.
Step 5: Now, scroll to the top and under “Input attachments”, click “Add”.
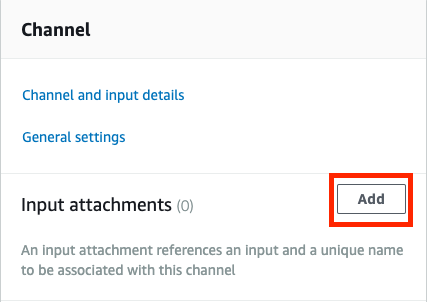
Then, choose the input that we created earlier and click “Confirm”.

Add Output Destinations
We can now add output destinations. These are basically the RTMP endpoints where we want MediaLive to push our stream.
We will configure Youtube and Twitch for this tutorial.
Step 1: Get your stream keys for Youtube and Twitch.
- For youtube, go to youtube.com/live_dashboard, and get your youtube stream key.
- For twitch, Login to your account. Go to settings and then navigate to the Channels & Videos tab to get your twitch stream key.
Step 2: Click on “Output 1: destination 1” under “Youtube” and paste the youtube stream key as “Stream Name”.
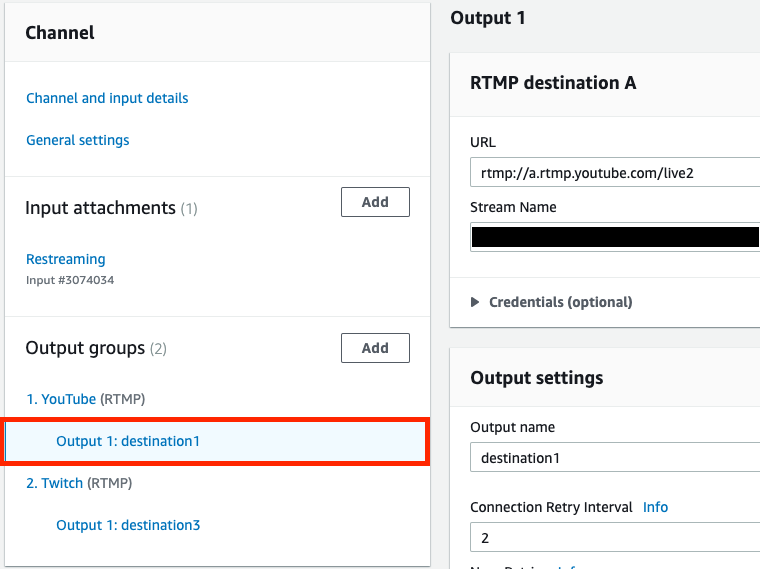
Step 2: Similarly, add the twitch destination as well.
Step 3: That’s all for the configurations part. Click “Create Channel”.
Once the channel is created, select it and click “Start”.

Wait for the state to change to “Running”. It will take a couple of minutes.
Streaming to AWS MediaLive
Now, navigate to the MediaLive input that we created. Copy the RTMP endpoint URL.
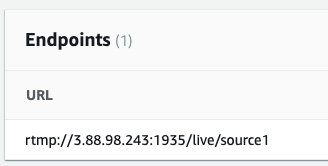
Open OBS, and configure the Stream endpoints, like so

Now from OBS, you can start streaming to AWS MediaLive, and it will distribute your stream to all the configured output destinations.
What’s Next?
Before you start multistreaming using AWS MediaLive, make sure to read how MediaLive is priced https://aws.amazon.com/medialive/pricing/ to get a rough idea of how much you will be billed.
See if AWS MediaLive is right for you by comparing it with other solutions like hosting a custom Nginx Server with RTMP module and services like Restream.io.
To avoid getting billing unnecessarily, don’t forget to delete the MediaLive resources that we created when they are not being used.