Using Python Virtual Environment in VSCode
When trying to use a Python virtual environment in VSCode, it was not detecting the virtual environment. The solution was very simple, but I couldn’t find it on Google.
Most of the solutions found on StackOverflow and Github were suggesting to change the pythonPath in VSCode settings.
This article shows how to use a Python virtual environment in VSCode, without having to change the pythonPath in VSCode settings.
Just for the sake of completeness, we will start by installing virtualenv and creating a virtual environment. If you are only interested in the VSCode setup, skip to the VSCode setup section directly.
Install Virtualenv
We will be using virtualenv to create our python virtual environments. We will use pip to install it.
Install virtualenv using pip:
pip install virtualenvCheck your installation:
virtualenv --versionCreate a Virtual Environment
First, let us create a folder .virtualenvs in the home directory. This is where we will keep all our virtual environments.
cd ~
mkdir .virtualenvs
cd .virtualenvs
From inside the .virtualenvs directory, create a new virtual environment using virtualenv
virtualenv venvNow, let us activate the virtual environment
source venv/bin/activateWe will install a package in the virtual environment so that we can test if the setup is working as expected.
pip install excelWe will create test.py that will import from the excel package that we just installed.
from excel import OpenExcelVSCode Setup
At first, if you open the test.py file, assuming you have Python linter extension installed, VSCode will show an error like this.
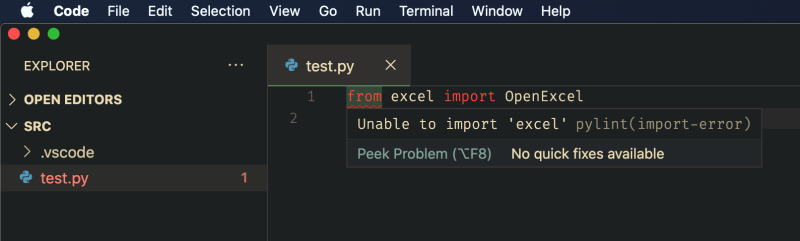
This is because VSCode is not using the correct python interpreter. There are two ways in which you can fix this.
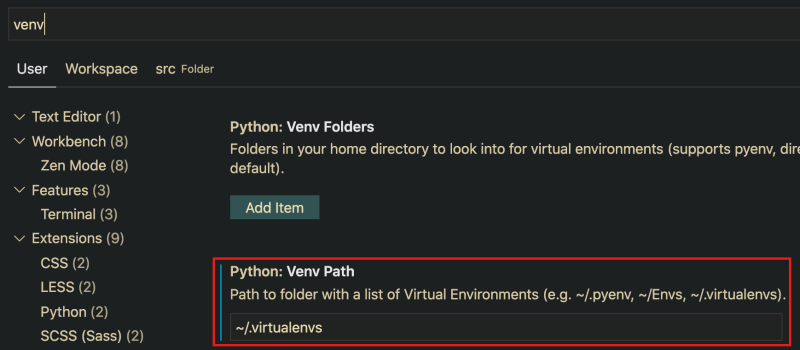
1. Update Venv Path Settings in VSCode
Open VSCode preferences (Ctrl + ,) and search for “venv”. Add ~/.virtualenvs to the “Venv Path” settings, like so:
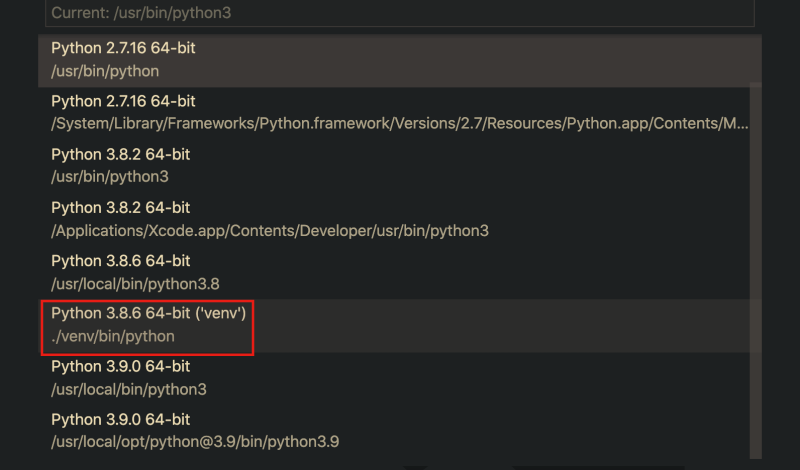
Restart VSCode and click on the interpreter version on the left-bottom corner.

Now, you will be able to see the virtual environment python interpreter in the interpreter list. Select it, now the issue should be resolved.
2. Add the Virtual Environment Folder to VSCode.
Add the folder that contains the virtual environment to VSCode, in our case, it is the ~/.virtualenv folder. Once added, you will be able to select the interpreter by clicking on the interpreter version displayed on the left-bottom corner.
That’s all folks 🙂