Clean React Architecture with Redux, Immer, TypeScript and Redux Observable

If you have been writing frontend applications using React, there is a good chance you would’ve felt that the code becomes harder to maintain as the application grows. The solution to this problem that has worked well for me so far is using the right set of libraries and proper separation of code – The Clean React Architecture.
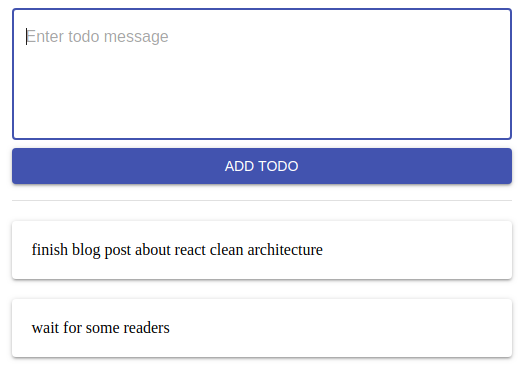
For illustration purposes, we will create a very simple todo listing application like below.
1. Create React App using TypeScript Template
We will be using TypeScript to introduce strict type checking in our React application. We can use create-react-app to create a fresh React application with TypeScript support by using the TypeScript template.
npx create-react-app clean-react-app --template typescriptJust by adding type definitions for all the objects and methods in our application, we can make our code more manageable in the long run and even catch hard to spot errors at compile-time.
It will be a boon to new developers joining the project and to yourself when you re-visit the project after a holiday!
2. Identifying & Defining Models
The first step is to define TypeScript interfaces for entities of our application. It is an ideal starting point because it will be the foundation of our application, and all other parts of our application will have a dependency on it.
For our sample todo application, we need to define the TodoItem interface and ApiStatus enum to represent a Todo item and the state of API calls, respectively.
export interface ITodoItem {
  id: number;
  description: string;
}

export enum ApiStatus {
  LOADING = 'loading',
  LOADED = 'loaded',
  FAILED = 'failed'
}
Convention: All interface names are to be prefixed with the letter ‘I’.
3. Redux for State Management
We will use Redux for all the state management because it makes our state more predictable, maintainable, and independently testable.
Let’s go ahead and install Redux, React-Redux, which is a React binding for Redux, Redux dev tools, and also the type definitions for React-Redux.
yarn add redux react-redux redux-devtools-extension
yarn add -D @types/react-redux
Strongly Typed Action Creators
We will give unique types for each of the actions using by TypeScript enums. Some people prefer to use constants for this, but I prefer using enums, it is very convenient and more of a TypeScript way in my opinion. Both works anyway, go ahead with your preferred way.
For our app, the following are the actions that are required:
- LoadTodo – triggers an API call to load todos from the server.
- LoadingTodos – will denote that API call is in progress.
- LoadedTodos – denotes that API call has completed successfully.
- LoadingTodosFailed – denotes that API call has failed.
- AddTodo – triggers an API call to save a new todo.
- AddingTodos – will denote that API call is in progress.
- AddedTodo – denotes that API call has completed successfully.
- AddingTodosFailed – denotes that API call has failed.
export enum TodosActionTypes {
  LOAD_TODOS = 'todos/load',
  LOADING_TODOS = 'todos/loading',
  LOADED_TODOS = 'todos/loaded',
  LOADING_TODOS_FAILED = 'todos/loading_failed',

  ADD_TODO = 'todos/add',
  ADDING_TODO = 'todos/adding',
  ADDED_TODOS = 'todos/added',
  ADDING_TODOS_FAILED = 'todos/adding_failed'
}
We will define the shape of the actions using interfaces.
export interface ILoadTodosAction {
  type: TodosActionTypes.LOAD_TODOS;
}

export interface ILoadingTodosAction {
  type: TodosActionTypes.LOADING_TODOS;
}
Convention: Name all the action interfaces with ‘Action’ as a suffix.
We will also create a type TodoAction that will group all the todo actions together using TypeScript unions. It will be helpful when we implement the reducers.
Finally, we will write our strongly-typed action creator functions using the enums and interfaces that we just defined.
import { ITodoItem } from "../models";

export function loadTodos(): ILoadTodosAction {
  return {
    type: TodosActionTypes.LOAD_TODOS
  }
}

export function loadingTodos(): ILoadingTodosAction {
  return {
    type: TodosActionTypes.LOADING_TODOS
  }
}

export function loadedTodos(todos: ITodoItem[]): ILoadedTodosAction {
  return {
    type: TodosActionTypes.LOADED_TODOS,
    payload: {
      todos
    }
  }
}

export function loadingTodosFailed(): ILoadingTodosFailedAction {
  return {
    type: TodosActionTypes.LOADING_TODOS_FAILED
  }
}

export function addTodo(description: string): IAddTodoAction {
  return {
    type: TodosActionTypes.ADD_TODO,
    payload: {
      description
    }
  }
}

export function addingTodo(): IAddingTodoAction {
  return {
    type: TodosActionTypes.ADDING_TODO
  }
}

export function addedTodo(todo: ITodoItem): IAddedTodoAction {
  return {
    type: TodosActionTypes.ADDED_TODOS,
    payload: {
      todo
    }
  }
}

export function addingTodoFailed(): IAddingTodoFailedAction {
  return {
    type: TodosActionTypes.ADDING_TODOS_FAILED
  }
}
Reducers with Immer
We will be using Immer – a library to work with immutability with ease, and it has excellent support for TypeScript.
Immer exposes a function called produce that takes the current state as input and gives a draft object on which all the state updates are performed. It will record all the updates, and finally, once we return the draft object, it will replay all the recorded updates on the state without mutating it. Immer makes this possible through JavaScript Proxy objects. That being said, we can jump to the implementation part.
We will define an interface ITodoState that will represent the “slice” of the state dedicated to keeping all the todo specific data. We can then use the interface to define the initial value.
export const initialTodoState: ITodoState = {
  loadingStatus: ApiStatus.LOADING,
  addingStatus: ApiStatus.LOADED,
  todos: []
}

export interface ITodoState {
  loadingStatus: ApiStatus;
  addingStatus: ApiStatus;
  todos: ITodoItem[];
}
Now we can implement the “slice reducer” function that will be responsible for managing all the updates to todos “slice “of the state. Our todo reducer will always act on the todo slice of the state, and it will respond to todo actions. Hence we can say it is a function of ITodoState and TodosAction. Here is the full implementation of our todos reducer.
export default function todosReducer(state: ITodoState = initialTodoState, action: TodosAction) {
  return produce(state, draft => {
    switch (action.type) {
      case TodosActionTypes.LOAD_TODOS:
      case TodosActionTypes.LOADING_TODOS:
        draft.loadingStatus = ApiStatus.LOADING;
        break;

      case TodosActionTypes.LOADING_TODOS_FAILED:
        draft.loadingStatus = ApiStatus.FAILED;
        break;

      case TodosActionTypes.LOADED_TODOS:
        draft.loadingStatus = ApiStatus.LOADED;
        draft.todos = action.payload.todos;
        break;

      case TodosActionTypes.ADD_TODO:
      case TodosActionTypes.ADDING_TODO:
        draft.addingStatus = ApiStatus.LOADING;
        break;

      case TodosActionTypes.ADDING_TODOS_FAILED:
        draft.addingStatus = ApiStatus.FAILED;
        break;

      case TodosActionTypes.ADDED_TODOS:
        draft.todos.push(action.payload.todo);
        break;
    }
  });
}
Just like how we use to combine all the “slice reducer” functions to create our root reducer, we will combine interfaces and initial values of all the “slices” of the state to define the interface and initial values of the whole state.
import { combineReducers } from 'redux';
import todosReducer, { ITodoState, initialTodoState } from './todosReducer';

export interface IState {
  todos: ITodoState;
}

export const initialState: IState = {
  todos: initialTodoState
};

export default combineReducers({
  todos: todosReducer
});Handling Async Actions with Redux Observables
In my opinion, using Redux Thunk to work with async actions makes our action creators long, dirty, and complex, as the application grows in size, it quickly becomes a problem. Redux observable is the solution to this.
As per the official Redux Observable website:
RxJS 6-based middleware for Redux. Compose and cancel async actions to create side effects and more.
Redux observable allows us to remove all the complexities from the action creators. Alternatively, we will write something called Epics to handle all the async actions.
An Epic is a function that takes a stream of actions and returns a stream of actions. Redux observable requires an understanding of RxJS, and it is out of the scope of this article. You can learn about RxJS here.
import { combineEpics, Epic } from "redux-observable";
import { switchMap, map, startWith, catchError, filter, mergeMap } from "rxjs/operators";
import axios from "axios";
import {
  TodosAction,
  TodosActionTypes,
  loadedTodos,
  loadingTodos,
  loadingTodosFailed,
  addedTodo,
  addingTodo,
  addingTodoFailed
} from "../actions/todosActions";
import { IState } from "../reducers";
import { from, of } from "rxjs";
import { isOfType } from "typesafe-actions";

const loadTodosEpic: Epic<TodosAction, TodosAction, IState> = (
  action$,
  state$
) =>
  action$.pipe(
    filter(isOfType(TodosActionTypes.LOAD_TODOS)),
    switchMap(action =>
      from(axios.get("http://localhost:5000/todos")).pipe(
        map(response => loadedTodos(response.data.data)),
        startWith(loadingTodos()),
        catchError(() => of(loadingTodosFailed()))
      )
    )
  );

const addTodoEpic: Epic<TodosAction, TodosAction, IState> = (
  action$,
  state$
) => action$.pipe(
  filter(isOfType(TodosActionTypes.ADD_TODO)),
  mergeMap(action =>
    from(axios.post("http://localhost:5000/todos", action.payload)).pipe(
      map(response => addedTodo(response.data.data)),
      startWith(addingTodo()),
      catchError(() => of(addingTodoFailed()))
    )
  )
)

export default combineEpics(loadTodosEpic, addTodoEpic);
Similar to reducers, we can split epics into multiple slice epics and finally combine them all using combineEpics method to create our root epic.
import { combineEpics, createEpicMiddleware } from 'redux-observable';
import todoEpics from './todoEpics';

export const rootEpic = combineEpics(todoEpics);

export default createEpicMiddleware();
Creating Redux Store
All the pieces required to create a Redux store are ready, we can put them all together along with Redux dev tools extension and create the store.
import { applyMiddleware, createStore } from 'redux';
import { composeWithDevTools } from 'redux-devtools-extension';
import epicMiddleware, { rootEpic } from './epics';

import rootReducer, { initialState } from './reducers';

const composeEnhancer = composeWithDevTools({
  name: 'React Clean Architecture'
});

const store = createStore(
  rootReducer,
  initialState,
  composeEnhancer(applyMiddleware(epicMiddleware))
);

epicMiddleware.run(rootEpic);

export default store;
We now have a fully typed Redux store!
4. React as View Layer
React should be just a view layer of our application. If we start writing logic in React components, it will become a mess very quickly. By moving all the logic to reducers and epics, we can keep our React components clean.
Creating Presentational Components
To keep it simple, we will put everything in a single component that will be responsible for loading todos from the server and list them. It will also have an option to create new todos.
Our component will need the loadTodos and addTodo action creators to load todos and create new todos, respectively. It also needs the loaded todos list, and the status of API calls to display the todos list and progress bar while it is loading.
Using React Hooks
We will directly import the action creators into our components. We will get the dispatch method using useDispatch hook, and use it to dispatch the actions. To get data from the redux store, we can use useSelector hook.
import React, { useEffect, useState } from 'react';
import { useDispatch, useSelector } from 'react-redux';

import { makeStyles, Theme } from '@material-ui/core/styles';
import Button from '@material-ui/core/Button';
import Divider from '@material-ui/core/Divider';
import TextField from '@material-ui/core/TextField';
import { ITodoItem, ApiStatus } from '../models';
import { loadTodos } from '../actions/todosActions';
import Paper from '@material-ui/core/Paper';
import { CircularProgress, Typography } from '@material-ui/core';

const useStyles = makeStyles((theme: Theme) => ({
  wrap: {
    display: 'flex',
    justifyContent: 'center'
  },
  content: {
    width: 500
  },
  addButton: {
    marginTop: theme.spacing.unit
  },
  divider: {
    marginTop: theme.spacing.unit * 2,
    marginBottom: theme.spacing.unit * 2
  }
}));

const App: React.FC = (props) => {
  const classes = useStyles();
  const [desc, setDesc] = useState('');
  const todos = useSelector(state => state.todos.todos);
  const loadingStatus = useSelector(state => state.todos.loadingStatus);
  const classes = useStyles();
  const dispatch = useDispatch();

  useEffect(() => {
    dispatch(loadTodos());
  }, []);

  const addNewTodo = () => {
    dispatch(addTodo(desc));
  }

  const onDescChange = (e: React.ChangeEvent<HTMLInputElement>) => {
    setDesc(e.target.value);
  }

  return (
    <div className={classes.wrap}>
      <div className={classes.content}>

        <div>
          <TextField multiline placeholder="Enter todo message" rows="5" variant="outlined" onChange={onDescChange} value={desc} fullWidth />
          <Button className={classes.addButton} color="primary" variant="contained" onClick={addNewTodo} fullWidth>Add Todo</Button>
        </div>

        <Divider className={classes.divider} />

        <div>
          {loadingStatus === ApiStatus.LOADING && <CircularProgress />}

          {loadingStatus === ApiStatus.FAILED && <Typography color="error">Failed to load todos</Typography>}

          {loadingStatus === ApiStatus.LOADED && todos.map(todo => (
            <Paper key={todo.id}>
              {todo.description}
            </Paper>
          ))}
        </div>

      </div>
    </div>
  );
}

export default App;
Note: React v16.8+ and React Redux version v7.1.0+ is required for using hooks.
Using Class-Based Components
We will define all the action creators required by components using a separate interface. I usually name this interface such that it ends with ‘DispatchProps’. E.g., IAppDispatchProps
Similarly, We will define all the data required from the Redux store using a separate interface. I usually name this interface such that it ends with ‘StateProps’. E.g., IAppStateProps
Finally, we will create a union AppProps of IAppDispatchProps and IAppStateProps.
import React from 'react';

import { createStyles, Theme, withStyles, WithStyles } from '@material-ui/core/styles';
import Button from '@material-ui/core/Button';
import Divider from '@material-ui/core/Divider';
import TextField from '@material-ui/core/TextField';
import { ITodoItem, ApiStatus } from '../models';
import Paper from '@material-ui/core/Paper';
import { CircularProgress, Typography } from '@material-ui/core';

const styles = (theme: Theme) => createStyles({
  wrap: {
    display: 'flex',
    justifyContent: 'center'
  },
  content: {
    width: 500
  },
  addButton: {
    marginTop: theme.spacing.unit
  },
  divider: {
    marginTop: theme.spacing.unit * 2,
    marginBottom: theme.spacing.unit * 2
  }
});

class App extends React.Component<AppProps> {
  constructor(props) {
    super(props);

    this.state = {
      desc: ''
    }
  }

  componentDidMount() {
    // Load todos on mount
    this.props.loadTodos();
  }

  addTodo = () => {
    this.props.addTodo(this.state.desc);
  }

  onDescChange = (e: React.ChangeEvent<HTMLInputElement>) => {
    this.setState({
      desc: e.target.value
    });
  }

  render() {
    const { classes, todos, loadingStatus } = this.props;

    return (
      <div className={classes.wrap}>
        <div className={classes.content}>

          <div>
            <TextField multiline placeholder="Enter todo message" rows="5" variant="outlined" onChange={this.onDescChange} value={this.state.desc} fullWidth />
            <Button className={classes.addButton} color="primary" variant="contained" onClick={this.addTodo} fullWidth>Add Todo</Button>
          </div>

          <Divider className={classes.divider} />

          <div>
            {loadingStatus === ApiStatus.LOADING && <CircularProgress />}

            {loadingStatus === ApiStatus.FAILED && <Typography color="error">Failed to load todos</Typography>}

            {loadingStatus === ApiStatus.LOADED && todos.map(todo => (
              <Paper key={todo.id}>
                {todo.description}
              </Paper>
            ))}
          </div>

        </div>
      </div>
    );
  }
}

export default withStyles(styles)(App);

// Define props coming from redux store
export interface IAppStateProps {
  loadingStatus: ApiStatus;
  todos: ITodoItem[];
}

// Define props that are action creators
export interface IAppDispatchProps {
  loadTodos: () => void;
  addTodo: (todo: ITodoItem) => void;
}

type AppProps = IAppStateProps & IAppDispatchProps & WithStyles<typeof styles>
To hook up the component with the Redux store, we will write a container, which simply imports IAppStateProps and uses it as the return type for mapStateToProps method, and imports IAppDispatchProps and use it as the type for mapDispatchToProps object.
import App, { IAppStateProps, IAppDispatchProps } from '../components/App';
import { IState } from '../reducers';
import { addTodo, loadTodos } from '../actions/todosActions';
import { connect } from 'react-redux';

function mapStateToDispatch(state: IState): IAppStateProps {
  return {
    todos: state.todos.todos,
    loadingStatus: state.todos.loadingStatus
  }
}

const mapDispatchToProps: IAppDispatchProps = {
  addTodo,
  loadTodos
}

export default connect(mapStateToDispatch, mapDispatchToProps)(App);
Don’t forget to add Provider at the root level for our application.
import React from 'react';
import ReactDOM from 'react-dom';
import { Provider } from 'react-redux';

import store from './store';
import AppContainer from './containers/AppContainer';

ReactDOM.render(
  <Provider store={store}>
    <AppContainer />
  </Provider>,
  document.getElementById("app")
);
5. Linting and Formatting with Git Hooks
We will use TSLint and Prettier to lint and auto format our code. It helps us to keep the codebase style consistent. This is very helpful when there are multiple people working on the same application.
yarn add -D tslint tslint-config-standard tslint-config-prettier tslint-react prettierWe can provide the linting and formatting rules through tslint.json and .prettierrc, and these files should be placed at the root level of our application. Go ahead and configure it based on your coding style.
Here is my configuration:
{
  "semi": true,
  "singleQuote": true,
  "trailingComma": "none",
  "tabWidth": 2,
  "useTabs": false,
  "bracketSpacing": true
}
{
"defaultSeverity": "error",
"extends": [
"tslint:recommended",
"tslint-config-standard",
"tslint-react",
"tslint-config-prettier"
],
"jsRules": {},
"rules": {
"ordered-imports": true,
"object-literal-sort-keys": false,
"member-ordering": false,
"jsx-no-lambda": false,
"jsx-boolean-value": false,
"member-access": false,
"max-line-length": [true, 150],
"no-var-requires": false
},
"rulesDirectory": []
}Once you have configured, we will start using them in 3 different ways – through the IDE plugins or using Git hooks or manually running commands from the command line. I prefer to do it through IDE and Git hooks.
Using Git Hooks
For using Git hooks, we will be using Husky, and to run the linters on the staged files, we will use Lint Staged.
yarn add -D husky lint-stagedAdd the following configurations to package.json. It basically says Husky to run lint-staged on Git commit. It then says lint-staged to run Prettier and TSlint on .ts, .tsx and .json files.
"husky": {
    "hooks": {
      "pre-commit": "lint-staged"
    }
  },
  "lint-staged": {
    "*.{json}": [
      "prettier --write"
    ],
    "*.{ts,tsx}": [
      "prettier --write",
      "tslint --fix",
      "git add"
    ]
  }
Consequently, when you try to commit, all the changed files will be linted and formatted first as per the rules provided in the configuration. If it finds any issues that cannot be auto-fixed, then it won’t allow you to commit.
Using IDE
If you are using VSCode, you can install TSLint and Prettier plugins. The plugins will read the .prettierrc and tslint.json files and start linting and formatting as you write code. You might have to enable the Format on Save option in your VSCode settings.
You can find the full code here.
Let me know in the comments section if you have any questions/suggestions.