How to Set up Vim as an IDE for React and TypeScript in 2020
Vim as an IDE for React and TypeScript Development in the era of modern IDEs like Intellij and VSCode, but why? Here are some reasons why people prefer using Vim as their goto code editor.
- Used Vim as the first IDE and got used to it.
- Lightweight and works smoothly without lags.
- Keyboard shortcuts that it provides improve productivity.
- Like the feeling of typing stuff into the terminal. (sorry!)
If you are not a Vim fan but somehow stumbled upon this article, I would still recommend you to try it out. After all, don’t you want to know what is so special about it?
Check If Vim is Installed
Open the terminal and run the command vim. If you see an error like “command not found,” then you don’t have it, and you need to install it.
But, if you see a screen like this, then you have Vim already. You can skip the installation section.
Install Vim
Vim can be installed using the built-in package manager.
Mac OS X
brew install vimUbuntu
apt-get install vimFedora
dnf -y install vim-enhancedInstall Vim Plugin Manager
To set up Vim as an IDE, we will be installing quite a few Vim plugins. To manage all these plugins easily, we will use a plugin manager vim-plug.
Install vim-plug by running the following command.
curl -fLo ~/.vim/autoload/plug.vim --create-dirs \
    https://raw.githubusercontent.com/junegunn/vim-plug/master/plug.vim
Open .vimrc file, and add the following block of code.
call plug#begin()
" This is where we will add plugins to install
call plug#end()
To install a plugin using vim-plug, add the list of plugin names between the two call statements. Then restart Vim and run the Vim command :PlugInstall to install all the plugins declared in the .vimrc file. Read more vim-plug usage here.
Tip: Instead of restarting Vim, you can reload the Vim configuration by running the Vim command :so %.
Also Read: My VSCode Setup – Plugins, Icons, Fonts & Theme
Intellij Color Scheme
We will be using a color scheme inspired by Intellij – gruvbox. Another reason to use this is, it works well with the syntax highlighter plugins.
To install, open ~/.vimrc and add the plugin name between call plug#begin() and call plug#end(). Like so:
call plug#begin()
" This is where we will add plugins to install

Plug 'morhetz/gruvbox'

call plug#end()
Restart Vim and run the Vim command :PlugInstall. Then, the plugin will be downloaded and installed.
Now to configure Vim to use the gruvbox color scheme add the following line to .vimrc.
colorscheme gruvboxMatching Color Scheme for Terminal
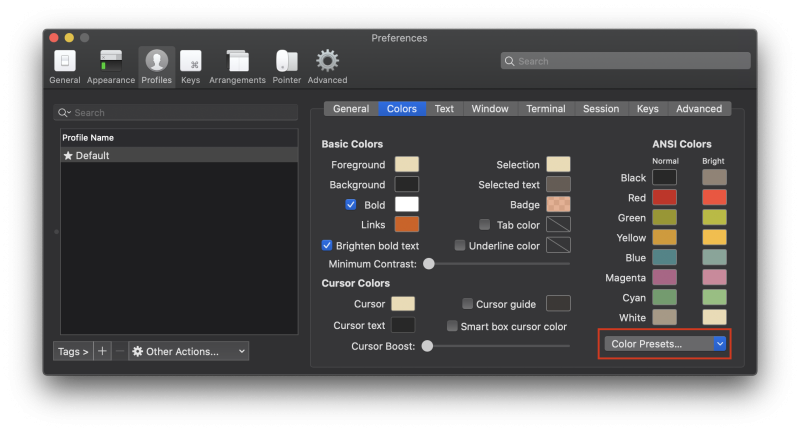
You can match your terminal’s color scheme to Vim’s color scheme by using the ports of the gruvbox color scheme. https://github.com/morhetz/gruvbox-contrib
Download the color scheme based on your terminal and import it.
For example, for iTerm2 download this file. Open iTerm2, Preferences -> Profile -> Colors tab -> Colors Preset -> Import.
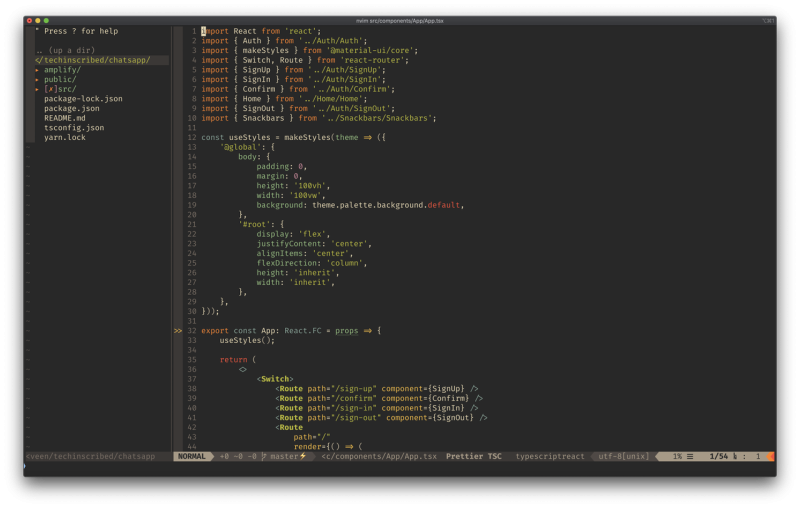
TypeScript Syntax Highlighting
To get the beautiful syntax highlighting that you saw in one of the previous images, we will use a plugin called yats (Github).
Plug 'HerringtonDarkholme/yats.vim'Yats provides better syntax highlight compared to all the alternatives, but Yats is also heavier compared to others. If you prefer a lightweight plugin and ok with simple syntax highlighting, then you can check out typescript-vim(Github) plugin.
Intellisense for TypeScript
I wasn’t convinced to try Vim as an IDE as setting up IntelliSense on Vim was not straight-forward, and I knew that without good IntelliSense, my productivity would go down drastically.
Then I found the Vim plugin coc.nvim, my opinion about Vim started to change.coc.nvim claims to make Vim as smart as VSCode, and it does!
Let’s install the plugin first.
Plug 'neoclide/coc.nvim'Then go to it’s Github repository and copy the example configuration and paste it in your .vimrc. The example configuration worked just fine for me.
Now you will start seeing IntelliSense like this. It also does linting and adds missing imports for you. Awesome!

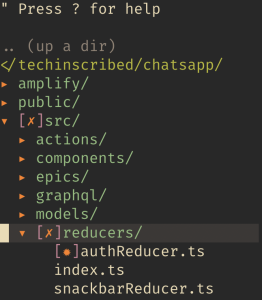
File Explorer using NerdTree
To get a File tree similar to that in VSCode, we will use the widely used NerdTree plugin.
Plug 'preservim/nerdtree'Open NerdTree by Default
I prefer to open the file explorer when Vim opens. If you prefer the same, add the following line of code to .vimrc.
autocmd VimEnter * NERDTreeFocus Editor
If you added the code to auto-open NerdTree, then NerdTree will get focused on opening Vim. To fix that and set focus on the editor by default, add the following line of code to .vimrc.
autocmd VimEnter * wincmd pAutoClose NerdTree
When the last file on the buffer is closed, it will leave the NerdTree open. To quit, we need to issue another :q command. Instead, we can close NerdTree when the last file is closed. To do that, add the following line of code to .vimrc.
autocmd bufenter * if (winnr("$") == 1 && exists("b:NERDTree") && b:NERDTree.isTabTree()) | q | endifGit Integration for NerdTree
VSCode indicates modified and staged files in File Explorer. To get a similar feature in Vim, we will install a plugin called nerdtree-git-plugin.
Plug 'Xuyuanp/nerdtree-git-plugin'Now, when a file is changed or deleted or added, it will be highlighted in the NerdTree.
Similarly, it will also highlight staged, renamed, untracked, submerged, deleted, dirty, clean, and ignored files. The symbols used for indicating these can be configured in .vimrc.
let g:NERDTreeIndicatorMapCustom = {
    \ "Modified"  : "✹",
    \ "Staged"    : "✚",
    \ "Untracked" : "✭",
    \ "Renamed"   : "➜",
    \ "Unmerged"  : "═",
    \ "Deleted"   : "✖",
    \ "Dirty"     : "✗",
    \ "Clean"     : "✔︎",
    \ 'Ignored'   : '☒',
    \ "Unknown"   : "?"
    \ }
Git Gutter
VSCode shows uncommitted changes on a gutter. We can get similar functionality using the plugin vim-gitgutter.
Plug 'airblade/vim-gitgutter'It can be customized to match the signs used by nerdtree-git-plugin.
let g:gitgutter_sign_added = '✚'
let g:gitgutter_sign_modified = '✹'
let g:gitgutter_sign_removed = '-'
let g:gitgutter_sign_removed_first_line = '-'
let g:gitgutter_sign_modified_removed = '-'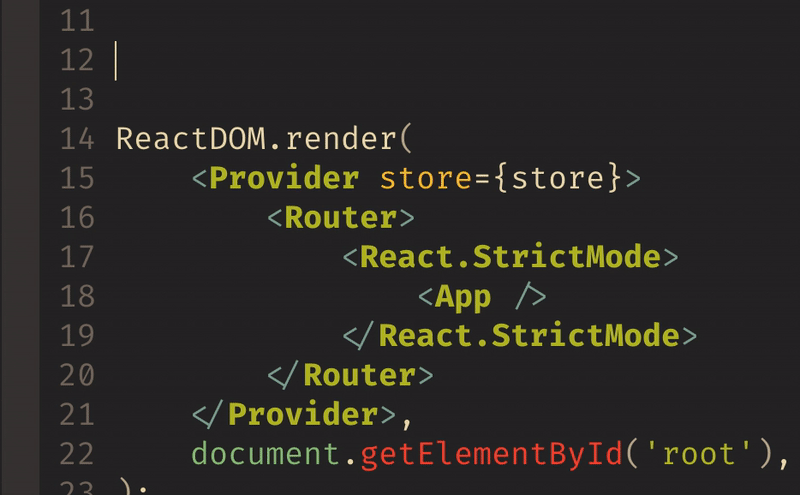
It can do more than merely adding signs to indicate added, modified, and removed lines. For example, it allows us to stage or undo a block of change inside a file. You can check out all the features here.
Here is my configuration for Git Gutter.
set signcolumn=yes

nmap ]h <Plug>(GitGutterNextHunk) "same as default
nmap [h <Plug>(GitGutterPrevHunk) "same as default

nmap ghs <Plug>(GitGutterStageHunk)
nmap ghu <Plug>(GitGutterUndoHunk)

let g:gitgutter_sign_added = '✚'
let g:gitgutter_sign_modified = '✹'
let g:gitgutter_sign_removed = '-'
let g:gitgutter_sign_removed_first_line = '-'
let g:gitgutter_sign_modified_removed = '-'
Status Bar using Airline
Next, we will install a plugin called vim-airline to get a status bar that shows current file information like line number, errors, warnings, file type, and even Git branch name.
Plug 'vim-airline/vim-airline'
Plug 'vim-airline/vim-airline-themes'
Next, we will configure vim-airline to use the powerline font.
let g:airline_powerline_fonts = 1If you wish to see the current Git branch name, it requires another plugin called vim-fugitive.
Plug 'tpope/vim-fugitive'vim-fugitive provides more features. You can check them here.
Finally, you should get a status bar that looks like this.

Fuzzy File Search
Fuzzy file search is something that I liked very much in IDEs like VSCode and Intellij. A Vim Plugin ctrlp provides a similar feature for Vim.
Plug 'ctrlpvim/ctrlp.vim'Now, when you hit Ctrl + p you should be able to perform a fuzzy file search.
Once you have found the file, it can be opened in a horizontal split by pressing ctrl + x or in a vertical split by pressing ctrl + v. Learn more here.
Other Plugins to Try
- Multiple Cursors – https://github.com/terryma/vim-multiple-cursors
- Colorized Brackets – https://github.com/frazrepo/vim-rainbow
- Code Commenter – https://github.com/preservim/nerdcommenter
What’s Next?
If you have finished setting up Vim to your liking, the next step is to learn the shortcut keys that Vim provides. Here is a list of useful Vim shortcuts to get you started.